
5 Beautiful Ways to Edge a Garden Border
Garden Design
5 Beautiful Ways to Edge a Garden Border
How to choose and install an edging style that makes the entire garden feel more intentional
A beautiful garden border does not end with the plants. The line where soil meets lawn, gravel, paving or a pathway has a surprising influence on how the entire garden feels. A clean edge gives even a young border definition, helps contain soil and mulch, and creates the quiet structure that allows flowers and foliage to look abundant without appearing untidy.
Before Choosing a Material
Decide What the Edge Needs to Do
Garden edging does not need to be elaborate or expensive. A traditional hand-cut edge can look every bit as refined as limestone or steel when it is carefully maintained. The best choice depends on the style of the garden, the surface beside the bed and the amount of maintenance you are comfortable providing.
An edge between a planting bed and a lawn has different requirements from one beside a gravel path. Lawn grass needs a clear boundary that prevents roots from creeping into the bed. Loose gravel needs a firm restraint that keeps stones from migrating into the soil.
Consider whether the edging needs to:
- Separate lawn from planting
- Hold gravel in place
- Contain mulch or soil
- Create a smooth mowing line
- Follow a curved border
- Complement the architecture of the home
- Reduce ongoing maintenance
Also decide how visible you want the material to be. Some edges nearly disappear, allowing the planting to remain the focus. Others become an intentional design detail that introduces limestone, brick or weathered metal into the garden.
Simple and Traditional
The Hand-Cut Lawn Edge
A hand-cut edge is one of the simplest and most elegant ways to define a garden border. It is especially suited to English-inspired gardens, cottage borders and informal lawns.
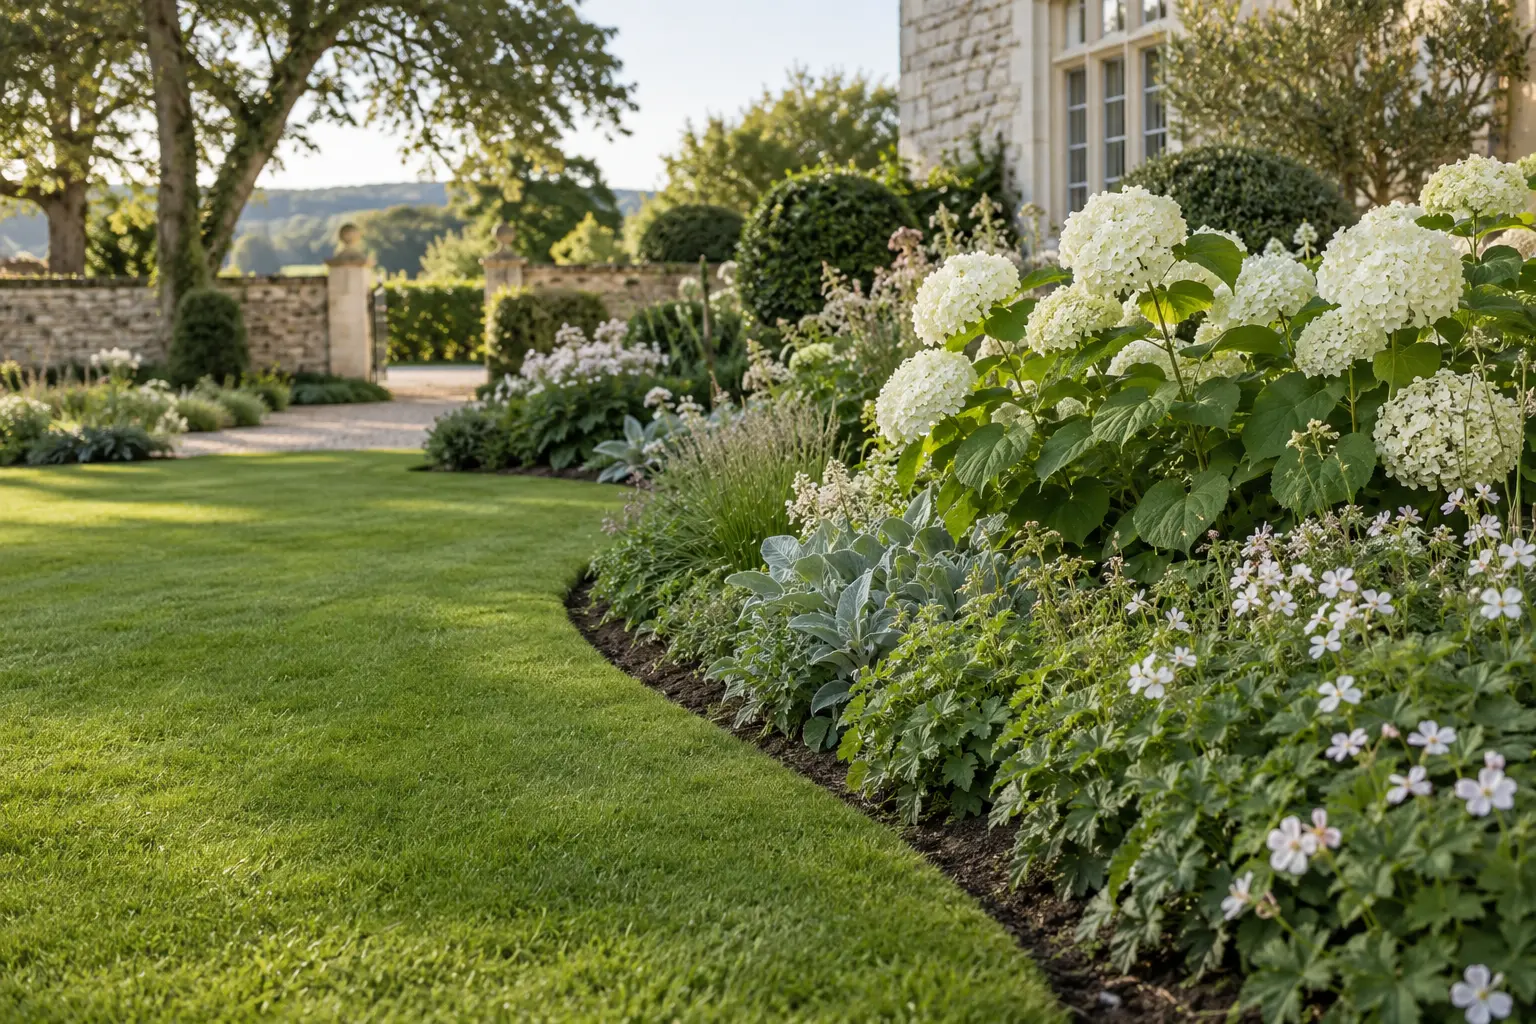
Rather than adding a physical material, the edge is created by cutting a narrow trench between the lawn and the planting bed. The lawn side remains crisp and nearly vertical, while the soil slopes gently back into the border.
Why It Works
A hand-cut edge creates a clean division without introducing another colour or material. From a distance, the dark line of exposed soil emphasizes the shape of the lawn. It is inexpensive, easy to adjust and ideal for creating graceful curves.
How to Create It
- Lay a garden hose along the proposed border.
- Step back and look at the curve from several directions.
- Avoid small, nervous waves. Fewer, more generous curves generally feel more natural.
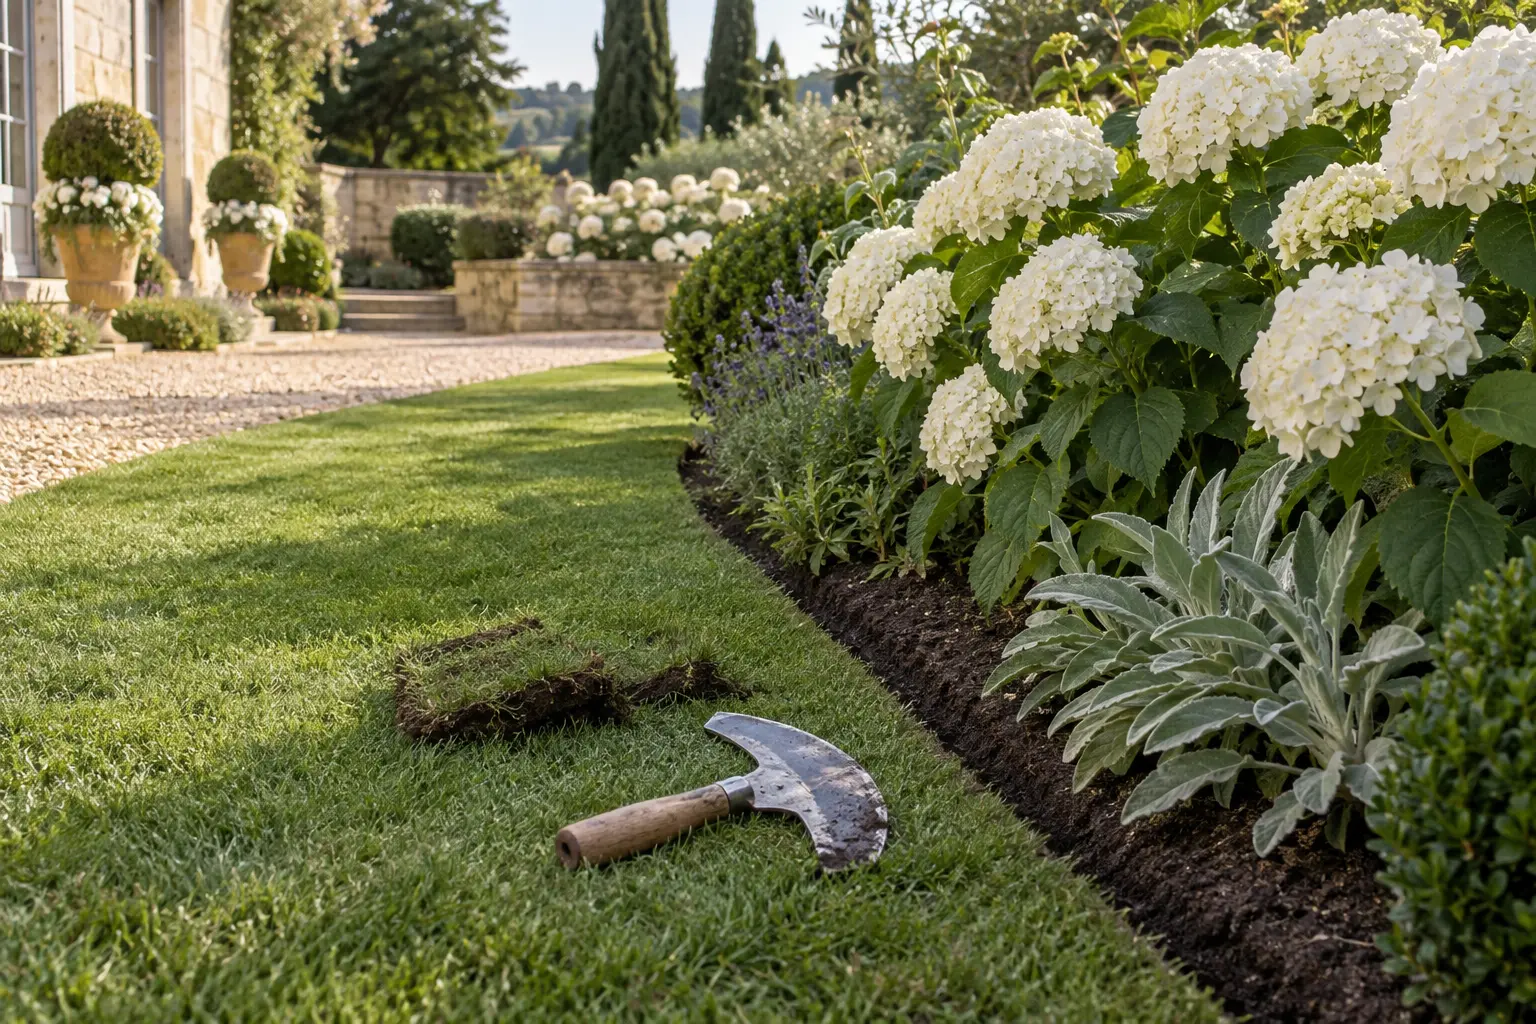
- Use a half-moon edging tool or sharp spade to cut approximately three to four inches into the soil.
- Keep the lawn side of the cut vertical.
- Remove the loosened strip of grass and soil.
- Slope the garden side gently back into the bed.
- Finish with mulch, keeping it slightly below the top of the lawn.
Maintenance
A natural edge usually needs to be refreshed several times during the growing season. Grass clippings and spreading lawn roots should be removed before they begin to soften the line. This option is best for gardeners who enjoy seasonal maintenance and want the flexibility to reshape a border over time.
Quiet and Precise
Slim Steel or Aluminum Edging
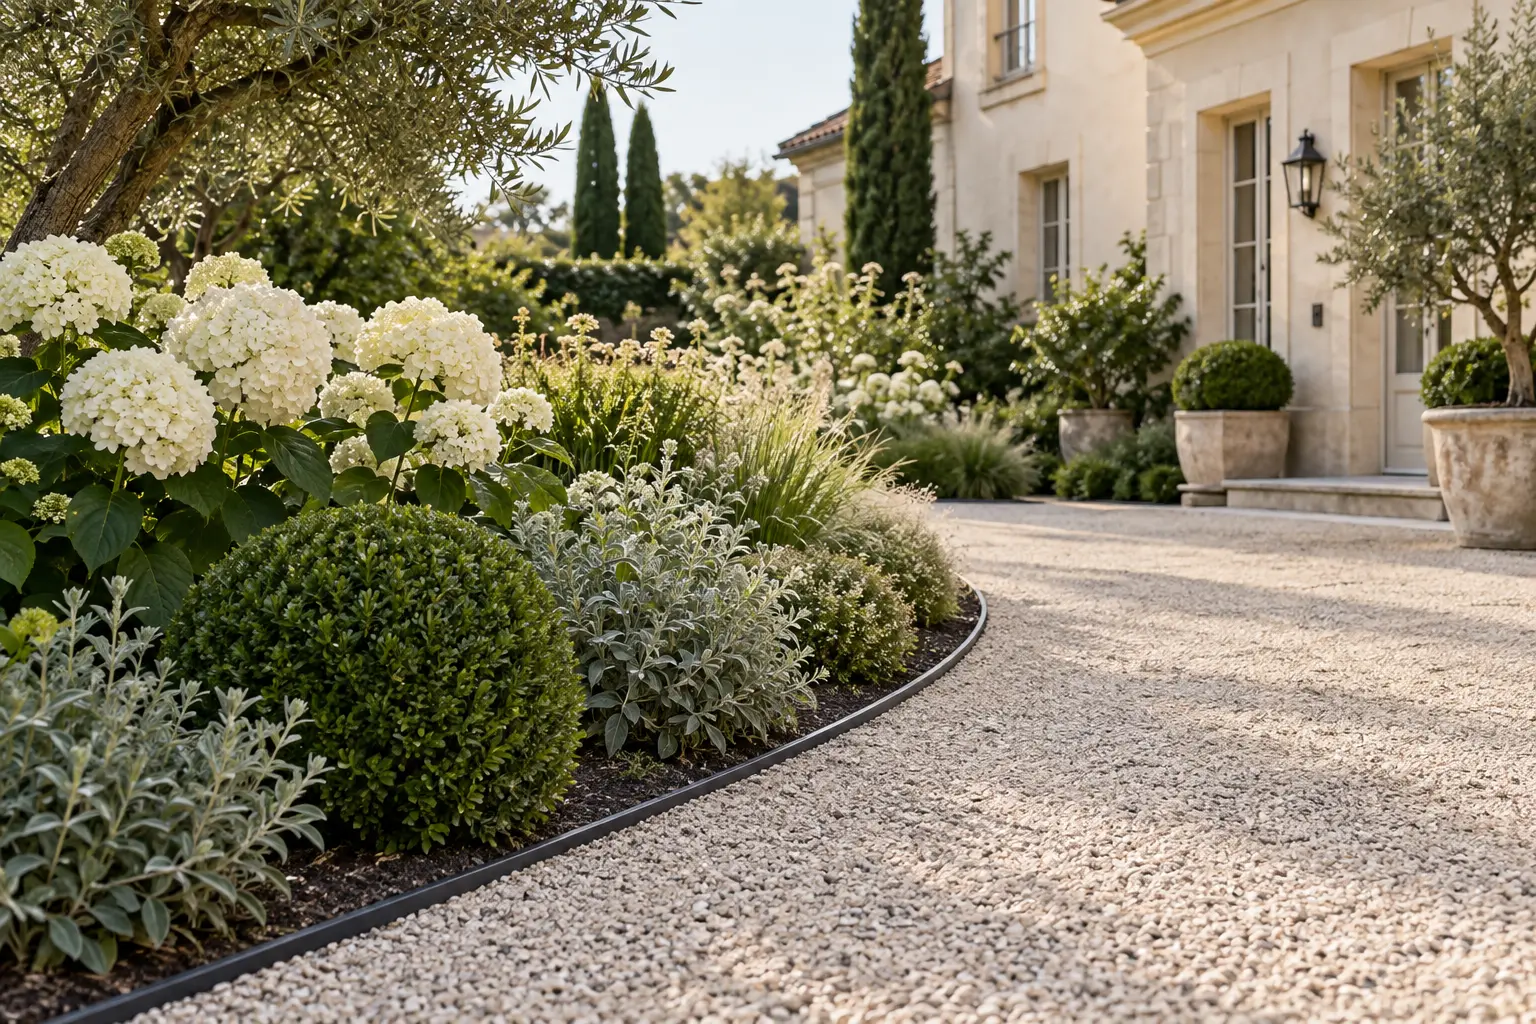
Metal edging creates a precise boundary while remaining almost invisible. It is particularly effective in contemporary European gardens, gravel courtyards and borders with long sweeping curves.
Why It Works
Steel has a substantial feel and may be powder-coated, galvanized or allowed to develop a weathered finish. Aluminum is lighter, does not rust and is often easier for a beginner to install. Both materials can bend into smooth curves and form clean straight lines.
How to Install It
- Mark the border with a garden hose or string.
- Cut a narrow trench following the line.
- Place the edging into the trench.
- Join adjoining sections according to the manufacturer’s directions.
- Secure the edging with the supplied stakes.
- Backfill firmly on both sides.
- Leave only a very small portion visible above the finished surface.
The top should be high enough to contain soil or gravel but not so high that it becomes a tripping hazard or interferes with mowing. Check occasionally for lifted sections, especially after winter in areas with repeated freezing and thawing.
Architectural and Timeless
Limestone or Natural Stone Edging
Limestone gives a garden border an established, architectural quality. It works particularly well beside cream-coloured homes, gravel paths, terraces and European-inspired planting.
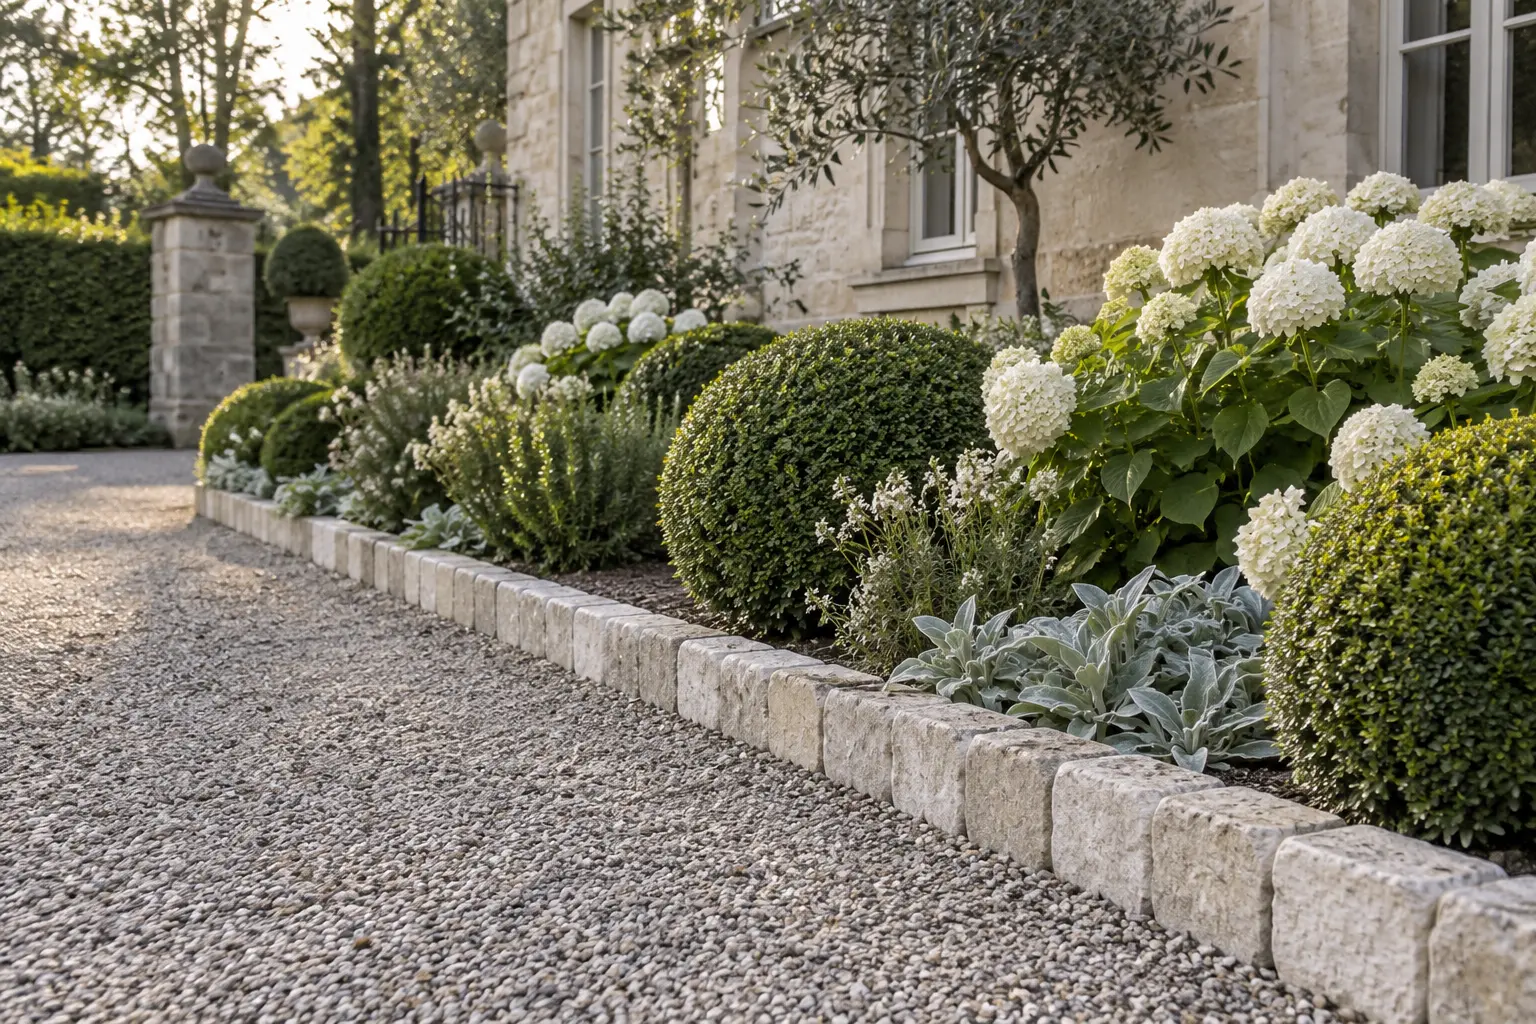
Why It Works
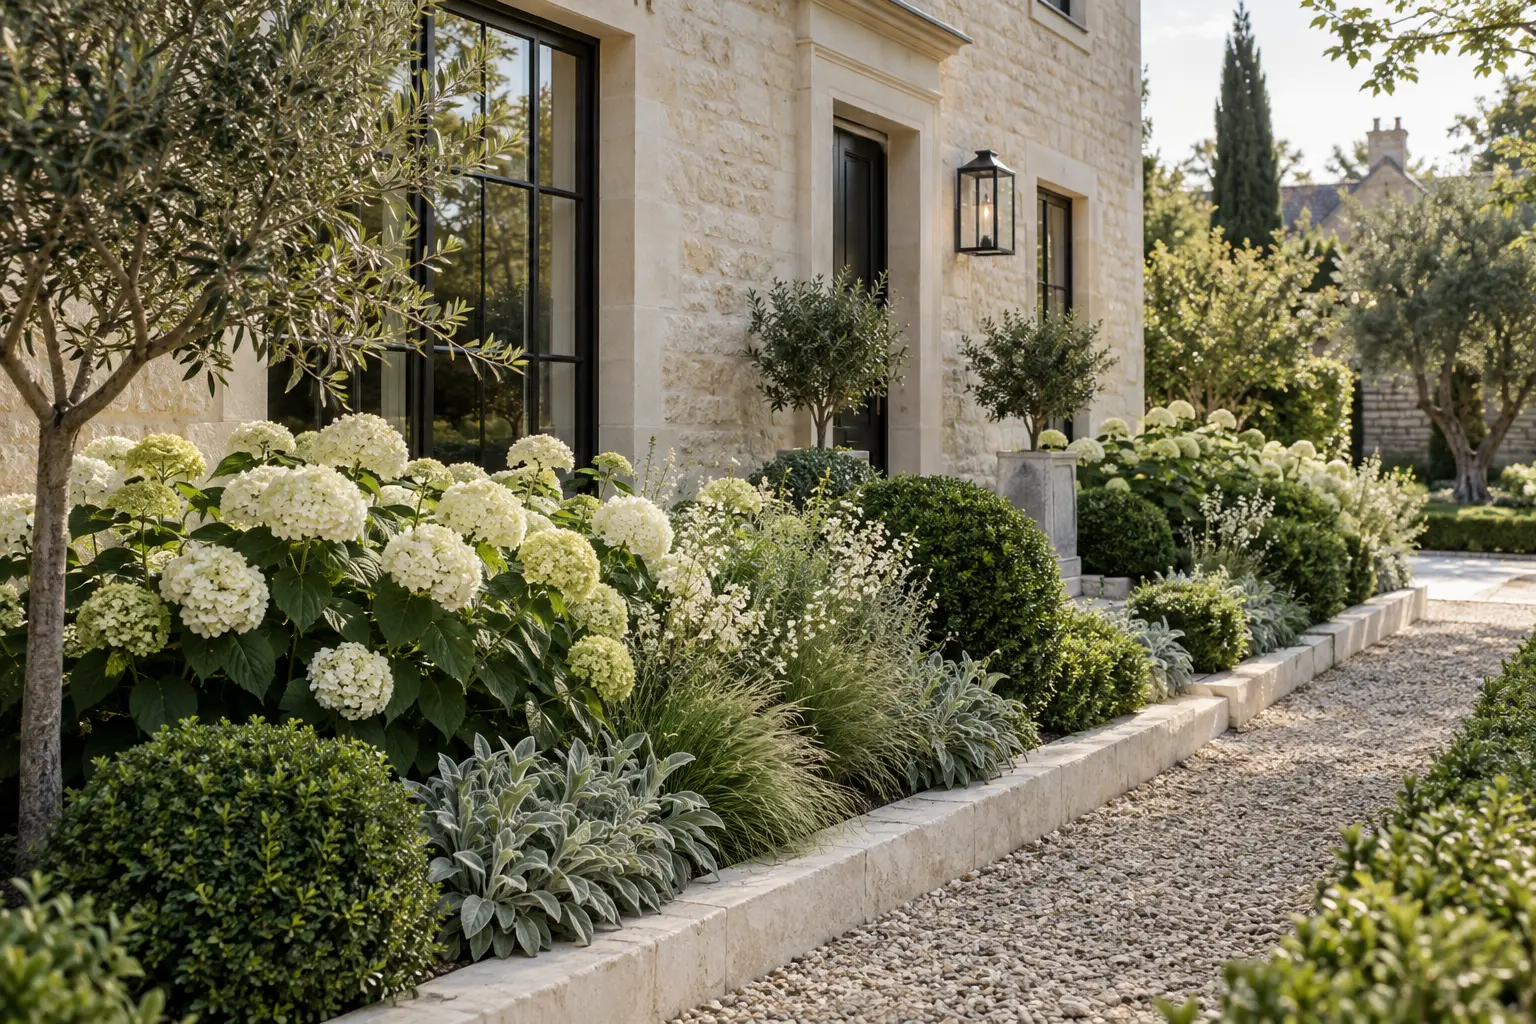
Natural stone introduces subtle variation in colour and texture. Limestone pairs beautifully with white hydrangeas, boxwood, olive trees, lavender, soft ornamental grasses, cream and silvery foliage, and warm gravel.
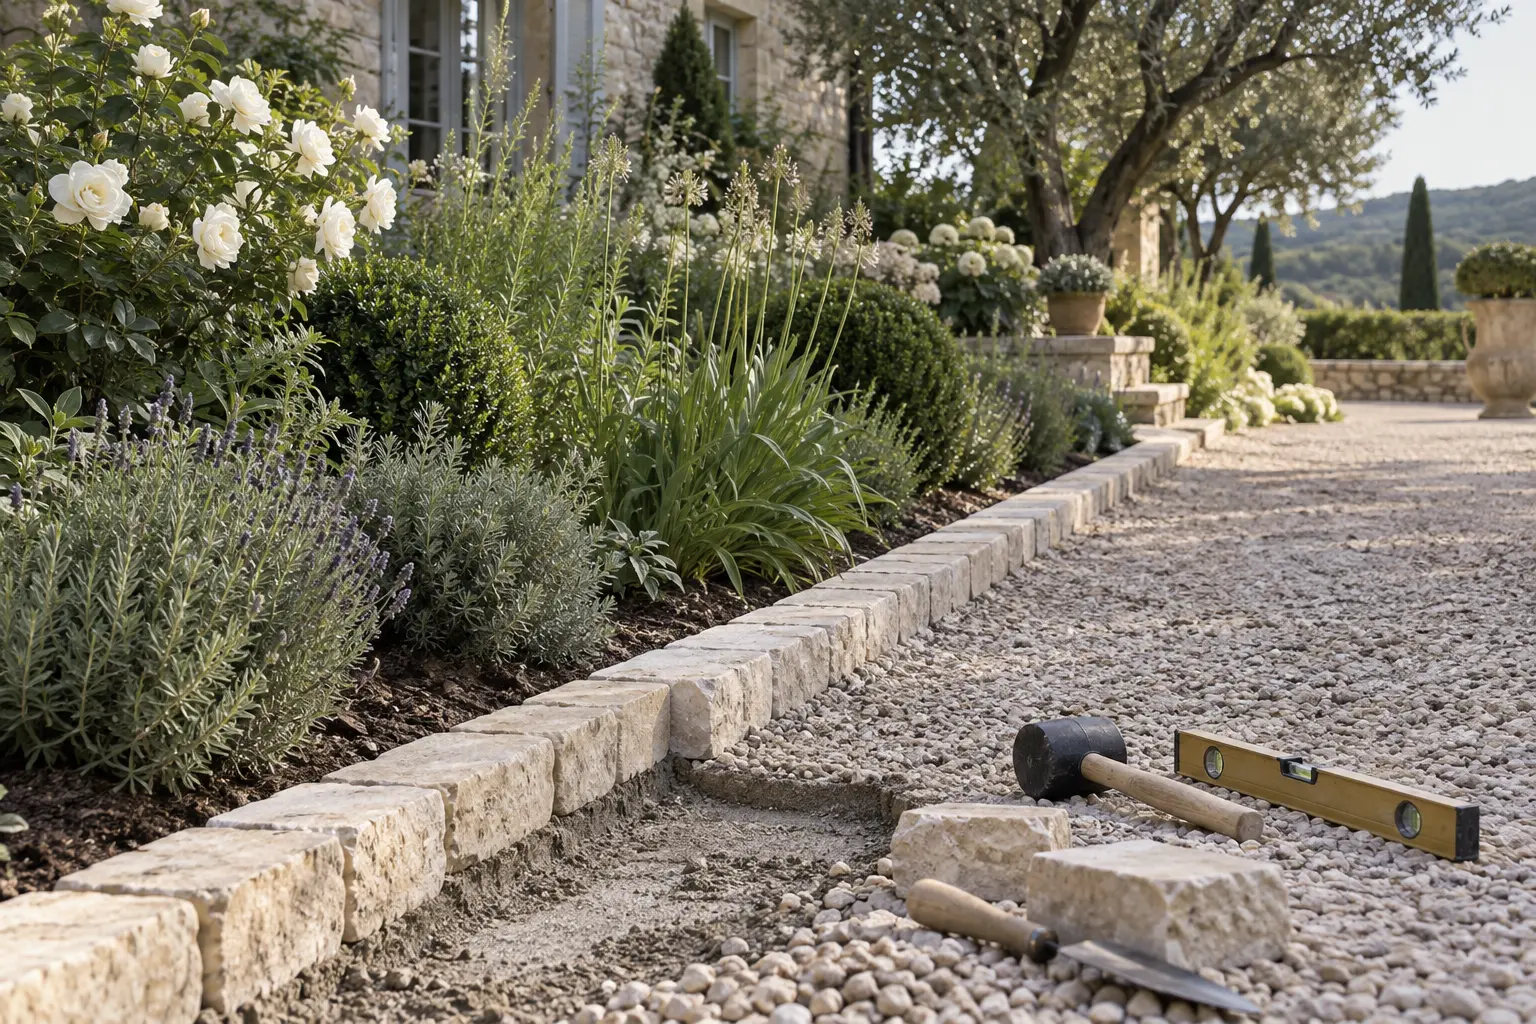
Prepare the Foundation
How to Install Stone Edging
- Mark the finished edging line.
- Measure the width and depth of the stone.
- Excavate for the stone and its supporting base.
- Add and compact a layer of crushed gravel.
- Add a thin bedding layer of sand or stone dust.
- Position each stone, checking height and alignment as you work.
- Fill the joints with the appropriate material.
- Backfill the garden side and finish with mulch.
Warm and Established
Reclaimed Brick or Clay Paver Edging
Brick creates a softer, warmer boundary than metal or pale limestone. It is particularly well suited to cottage gardens, traditional homes, kitchen gardens and borders containing terracotta pots.
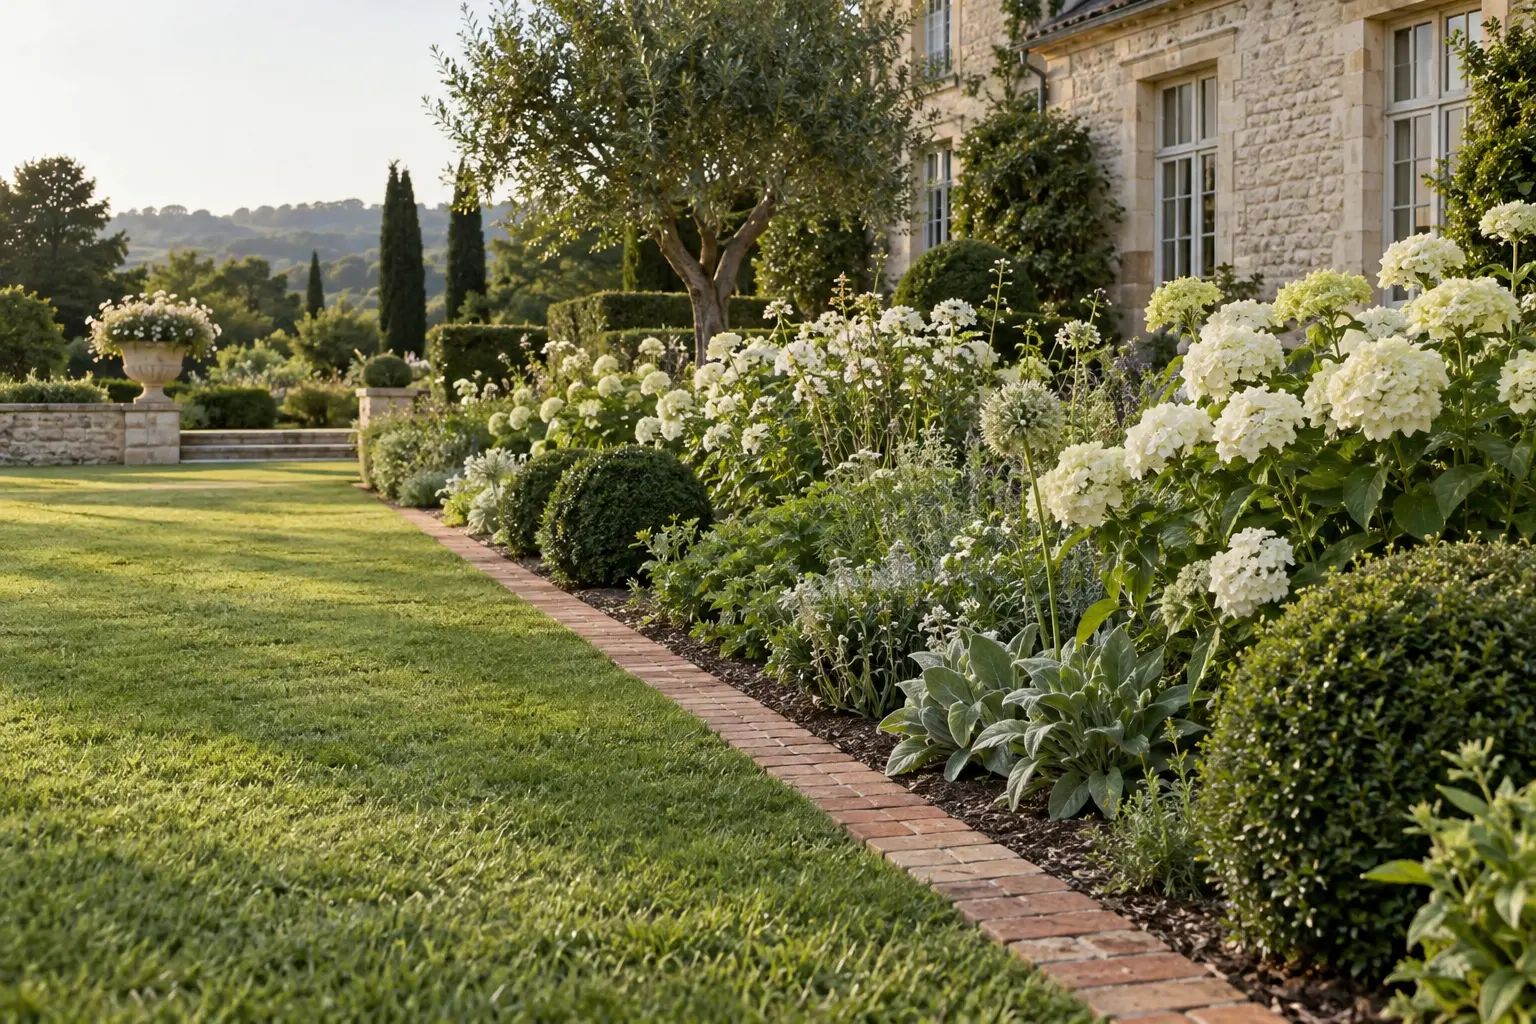
Why It Works
The muted terracotta tones add warmth without overwhelming the planting. Reclaimed bricks bring gentle variation and a sense of age, while new clay pavers create a more consistent appearance. Choose restrained colouring rather than bright orange or highly contrasting red.
How to Install a Flat Brick Edge
- Arrange the bricks temporarily to confirm the pattern and width.
- Mark both sides of the proposed edge.
- Excavate for the brick and supporting base.
- Add a compacted layer of fine gravel.
- Add a shallow layer of bedding sand.
- Lay the bricks level with or slightly above the lawn.
- Check the line regularly with a level and string.
- Sweep jointing sand between the bricks and backfill the garden side.
Soft and Textural
A Gravel Transition Strip
A narrow gravel strip creates breathing room between a planted border and a lawn, wall or paved surface. It can make a dense garden feel lighter while providing practical access for pruning and maintenance.
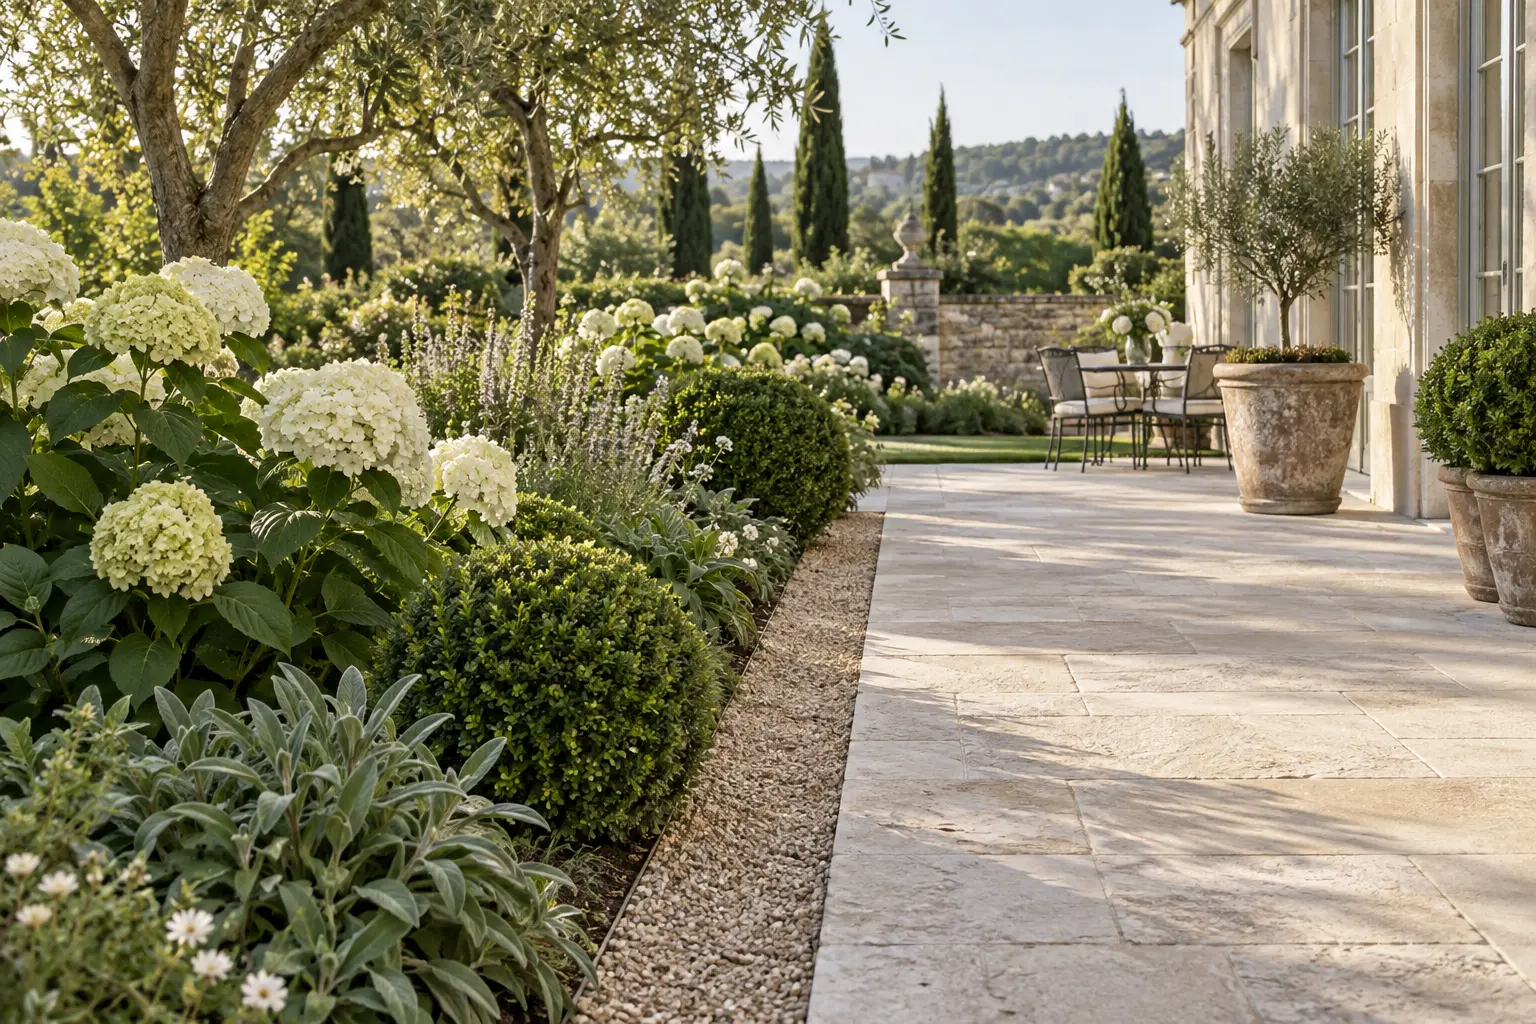
Why It Works
Gravel adds texture without introducing a heavy solid edge. It can separate planting from a wall, provide access behind mature shrubs, catch soil before it reaches paving and connect a border visually to a gravel path.
How to Install It
- Mark a strip approximately six to twelve inches wide.
- Excavate the area evenly and compact the soil.
- Install a firm restraint where the gravel needs to be contained.
- Add a compacted gravel base where greater stability is required.
- Finish with an even layer of decorative gravel.
- Keep the finished level slightly below adjacent paving or lawn.
Choose gravel that complements the home and existing hardscape. Warm limestone, buff gravel and muted grey-beige stone are generally easier to integrate than bright white aggregate.
A Quick Comparison
Which Garden Edging Is Best?
The best edging is the one that suits both the garden and the amount of maintenance you realistically want to provide.
| Edging style | Best suited to | Maintenance | Overall character |
|---|---|---|---|
| Hand-cut edge | Lawns and curved cottage borders | Moderate | Natural and traditional |
| Steel or aluminum | Gravel, modern borders and smooth curves | Low | Quiet and precise |
| Limestone or stone | Formal and European-inspired gardens | Low to moderate | Architectural and timeless |
| Brick or clay pavers | Cottage gardens and traditional homes | Moderate | Warm and established |
| Gravel strip | Mediterranean gardens and maintenance access | Moderate | Relaxed and textural |
Hand-Cut Edge
Best for: Lawns and cottage borders
Maintenance: Moderate
Natural and traditional
Steel or Aluminum
Best for: Gravel and smooth curves
Maintenance: Low
Quiet and precise
Limestone or Stone
Best for: European-inspired gardens
Maintenance: Low to moderate
Architectural and timeless
Brick or Clay Pavers
Best for: Cottage and traditional gardens
Maintenance: Moderate
Warm and established
Gravel Strip
Best for: Mediterranean gardens and access
Maintenance: Moderate
Relaxed and textural
For an understated result, choose hand-cut or metal edging. For a more architectural garden, limestone creates the strongest connection to the home. Brick introduces warmth, while gravel provides a softer transition and valuable breathing room.
Plan Before You Dig
How to Shape the Border
Use a garden hose to test the line before cutting or excavating. Walk past it from several directions and view it from the main windows of the home.
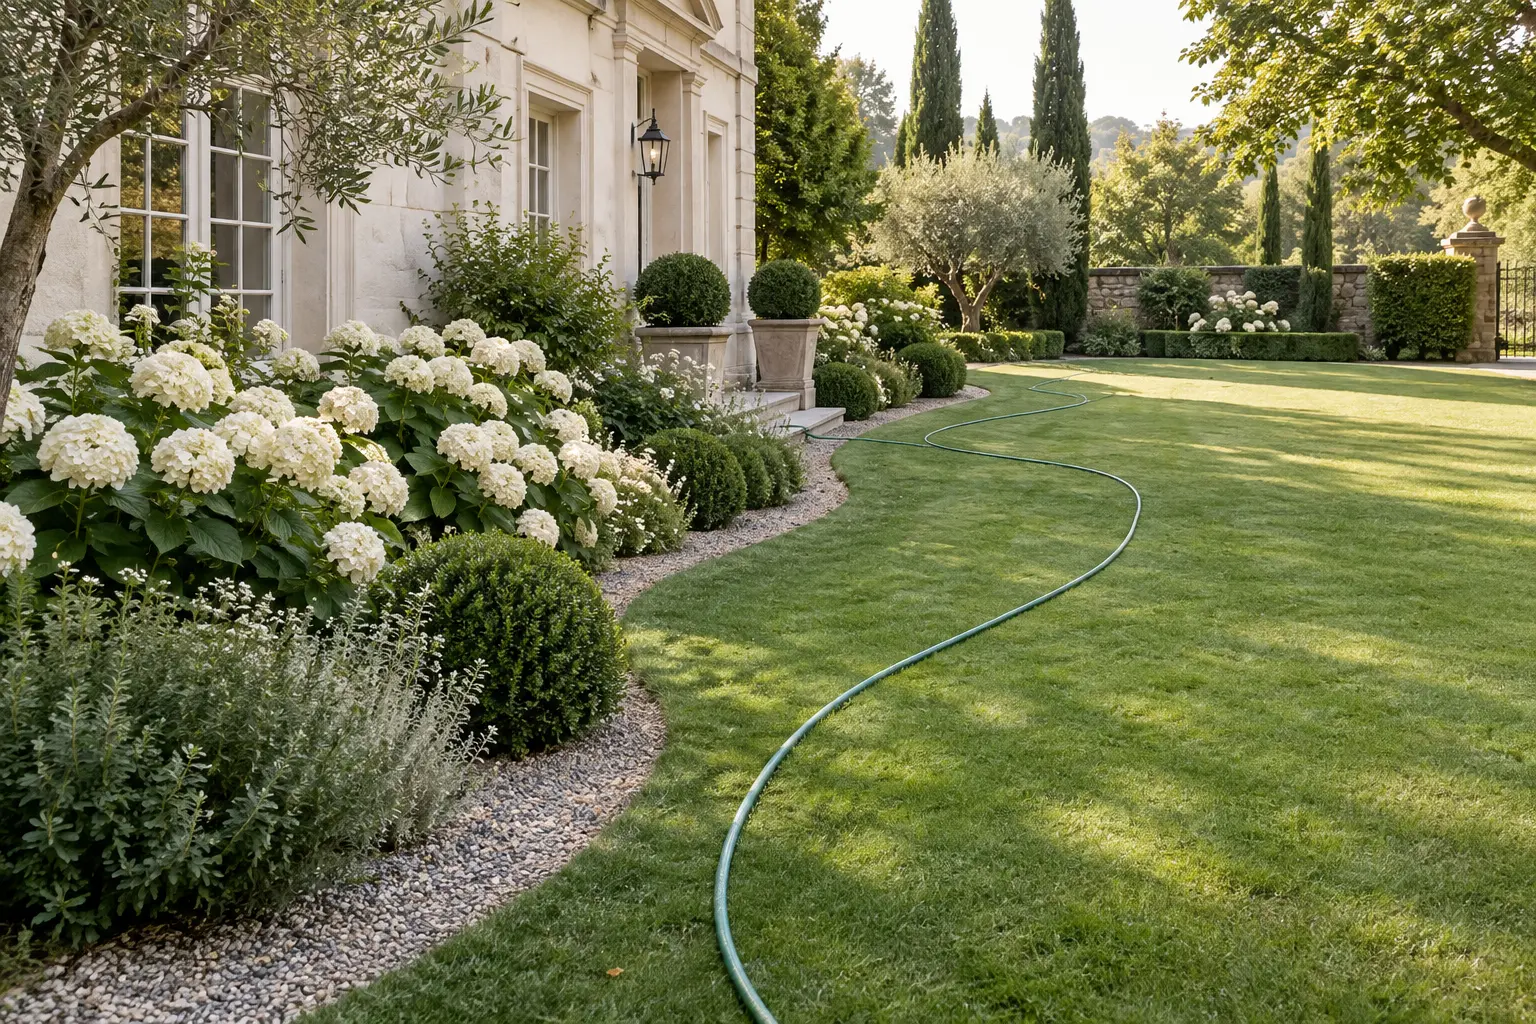
Long, generous curves generally look more natural than several small bends. Straight edges should be genuinely straight and relate to an architectural feature such as a wall, terrace, pathway or window.
If the border is narrow, consider whether expanding it slightly would improve the proportions. A wider bed provides enough depth for shrubs, perennials and a softened front edge. It can also make lawn maintenance easier by eliminating awkward strips of grass.
Details That Matter
Common Garden-Edging Mistakes
Making the Edge Too Complicated
A border with numerous small curves can feel restless. Simplify the line and allow the planting to create movement.
Skipping the Stable Base
Brick and stone will shift on soft soil. Compacting the foundation is what keeps the finished edge level.
Leaving Edging Too High
Raised metal, brick or stone can become a tripping hazard and make mowing more difficult.
Competing With the House
Introduce a material only when it complements the existing stone, brick, gravel or paving.
Ignoring Mature Plant Width
Allow enough bed depth for shrubs to mature without leaning heavily over the lawn or pathway.
Using Too Many Materials
Repeating one or two materials creates continuity. Too many edges divide the garden into unrelated sections.
A Low-Risk First Step
A Simple Beginner Approach
If you are unsure where to begin, start with one visible border rather than attempting to edge the entire garden at once.
Mark the line with a hose and live with it for several days. Notice whether the curve feels natural and whether the proposed bed is deep enough for the mature plants.
For the least expensive option, create a hand-cut edge and maintain it for one season. This gives you time to adjust the shape before committing to stone, brick or metal. Once the line feels right, a permanent material can be installed with greater confidence.
FROM THE JOURNAL
Recent Reads
October 6, 2026
How to Design a Beautiful Shade Garden: A Simple Layering Formula
September 17, 2026
How to Design a White Hydrangea Border
September 12, 2026
How to Choose the Right Hydrangea for Your Garden
September 10, 2026
What to Plant, Prune and Notice This Season
September 10, 2026
How to Design a Mediterranean Front Entrance
September 7, 2026